Customize Apache Zeppelin homepage
Apache Zeppelin allows you to use one of the notebooks you create as your Zeppelin Homepage. With that you can brand your Zeppelin installation, adjust the instruction to your users needs and even translate to other languages.
How to set a notebook as your Zeppelin homepage
The process for creating your homepage is very simple as shown below:
- Create a notebook using Zeppelin
- Set the notebook id in the config file
- Restart Zeppelin
Create a notebook using Zeppelin
Create a new notebook using Zeppelin,
you can use %md interpreter for markdown content or any other interpreter you like.
You can also use the display system to generate text, html, table or
Angular (backend API, frontend API).
Run (shift+Enter) the notebook and see the output. Optionally, change the notebook view to report to hide the code sections.
Set the notebook id in the config file
To set the notebook id in the config file, you should copy it from the last word in the notebook url. For example,

Set the notebook id to the ZEPPELIN_NOTEBOOK_HOMESCREEN environment variable
or zeppelin.notebook.homescreen property.
You can also set the ZEPPELIN_NOTEBOOK_HOMESCREEN_HIDE environment variable
or zeppelin.notebook.homescreen.hide property to hide the new notebook from the notebook list.
Restart Zeppelin
Restart your Zeppelin server
./bin/zeppelin-deamon stop
./bin/zeppelin-deamon start
That's it! Open your browser and navigate to Apache Zeppelin and see your customized homepage.
Show notebooks list in your custom homepage
If you want to display the list of notebooks on your custom Apache Zeppelin homepage all you need to do is use our %angular support.
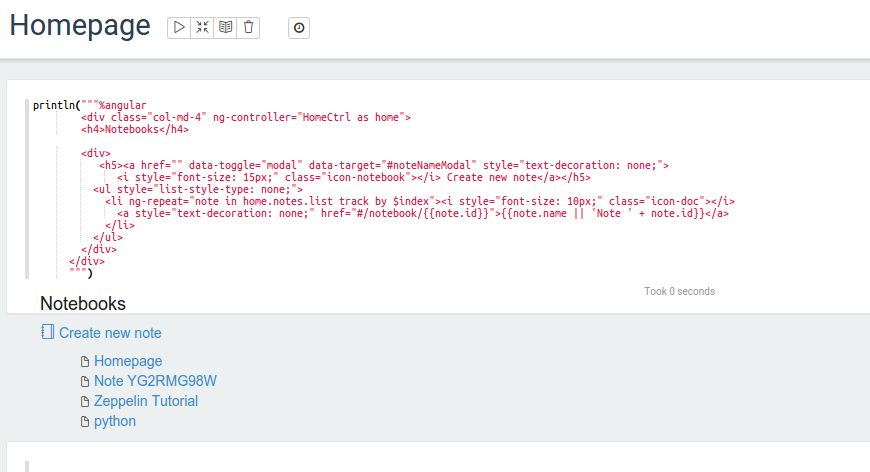
Add the following code to a paragraph in you home page and run it... walla! you have your notebooks list.
println(
"""%angular
  <div class="col-md-4" ng-controller="HomeCtrl as home">
    <h4>Notebooks</h4>
    <div>
      <h5><a href="" data-toggle="modal" data-target="#noteNameModal" style="text-decoration: none;">
        <i style="font-size: 15px;" class="icon-notebook"></i> Create new note</a></h5>
        <ul style="list-style-type: none;">
          <li ng-repeat="note in home.notes.list track by $index"><i style="font-size: 10px;" class="icon-doc"></i>
            <a style="text-decoration: none;" href="#/notebook/"></a>
          </li>
        </ul>
    </div>
  </div>
""")
After running the notebook you will see output similar to this one:

The main trick here relays in linking the <div> to the controller:
<div class="col-md-4" ng-controller="HomeCtrl as home">
Once we have home as our controller variable in our <div></div>
we can use home.notes.list to get access to the notebook list.
