Zeppelin Notebook Authorization
Overview
We assume that there is an Shiro Authentication component that associates a user string and a set of group strings with every NotebookSocket. If you don't set the authentication components yet, please check Shiro authentication for Apache Zeppelin first.
Authorization Setting
You can set Zeppelin notebook permissions in each notebooks. Of course only notebook owners can change this configuration. Just click Lock icon and open the permission setting page in your notebook.
As you can see, each Zeppelin notebooks has 3 entities :
- Owners ( users or groups )
- Readers ( users or groups )
- Writers ( users or groups )
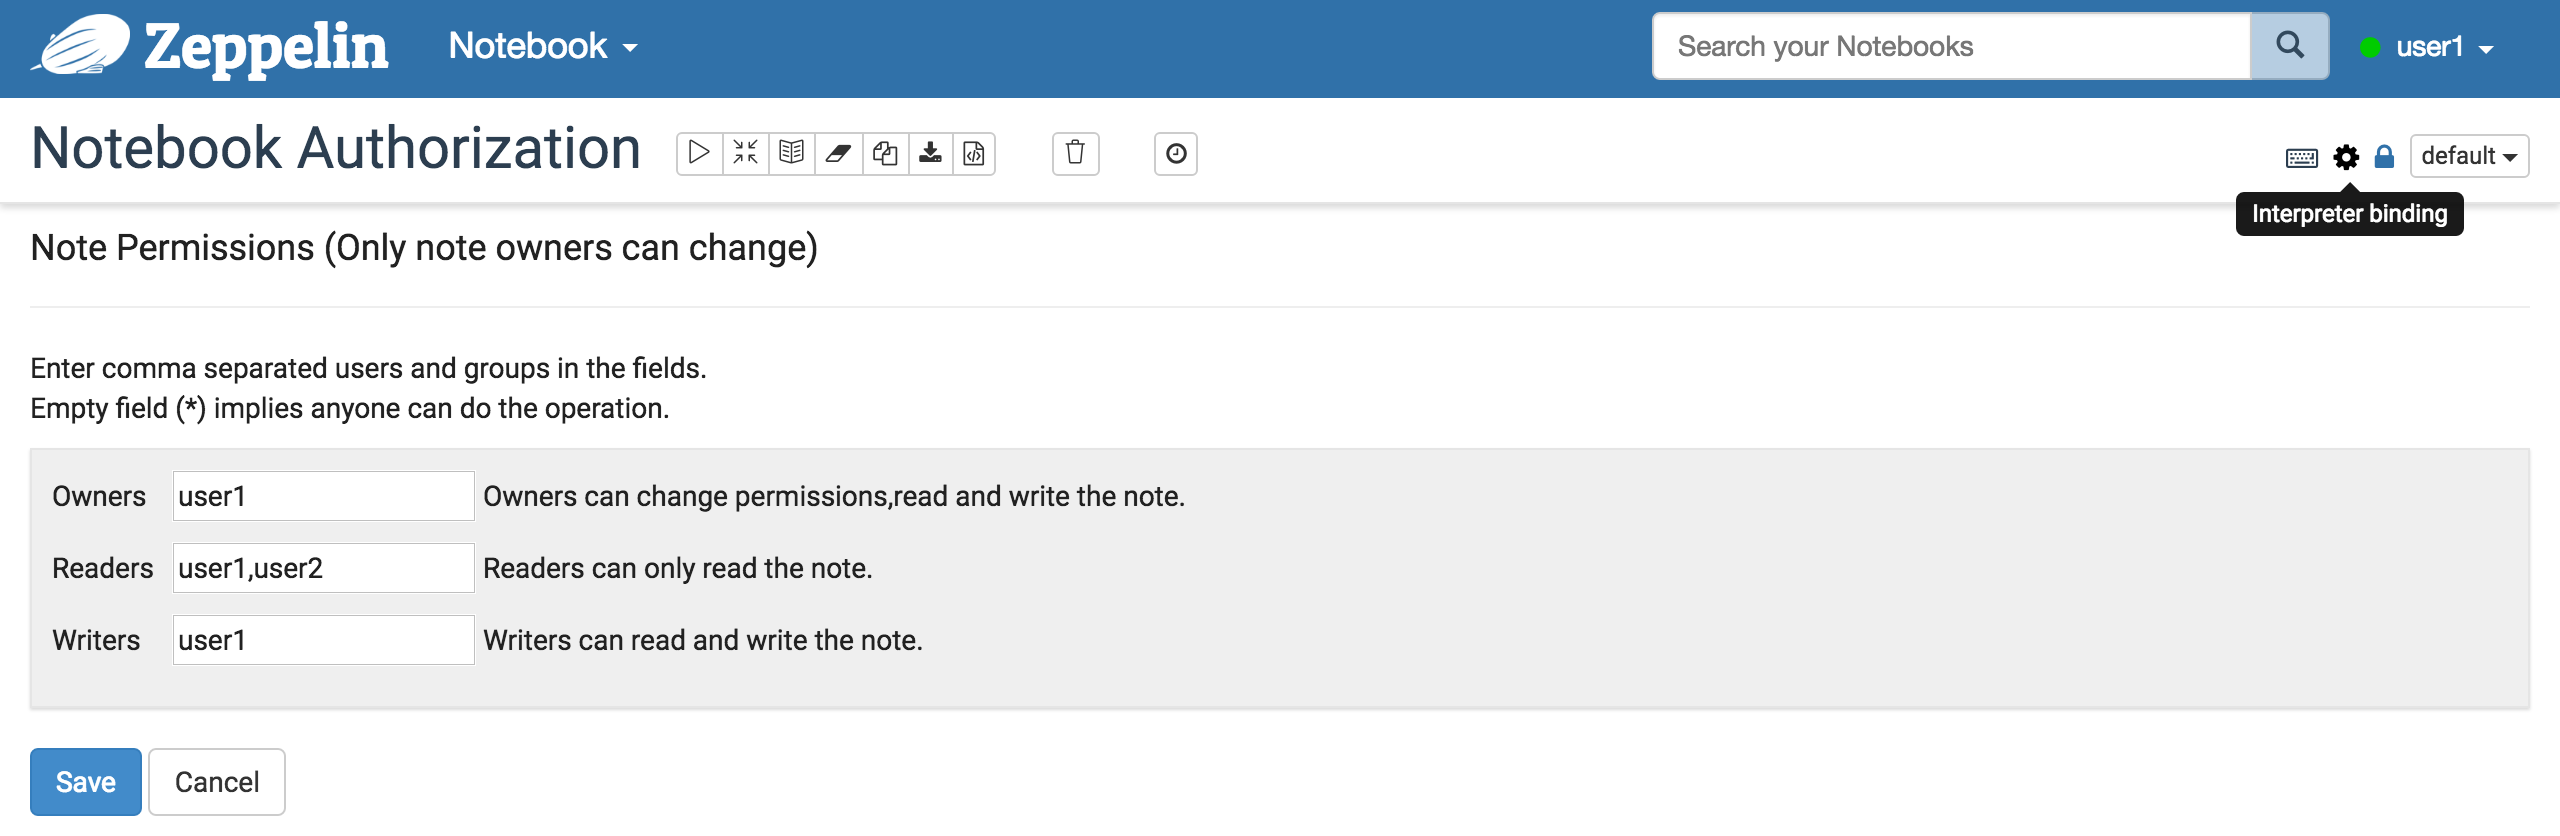
Fill out the each forms with comma seperated users and groups configured in conf/shiro.ini file.
If the form is empty (*), it means that any users can perform that operation.
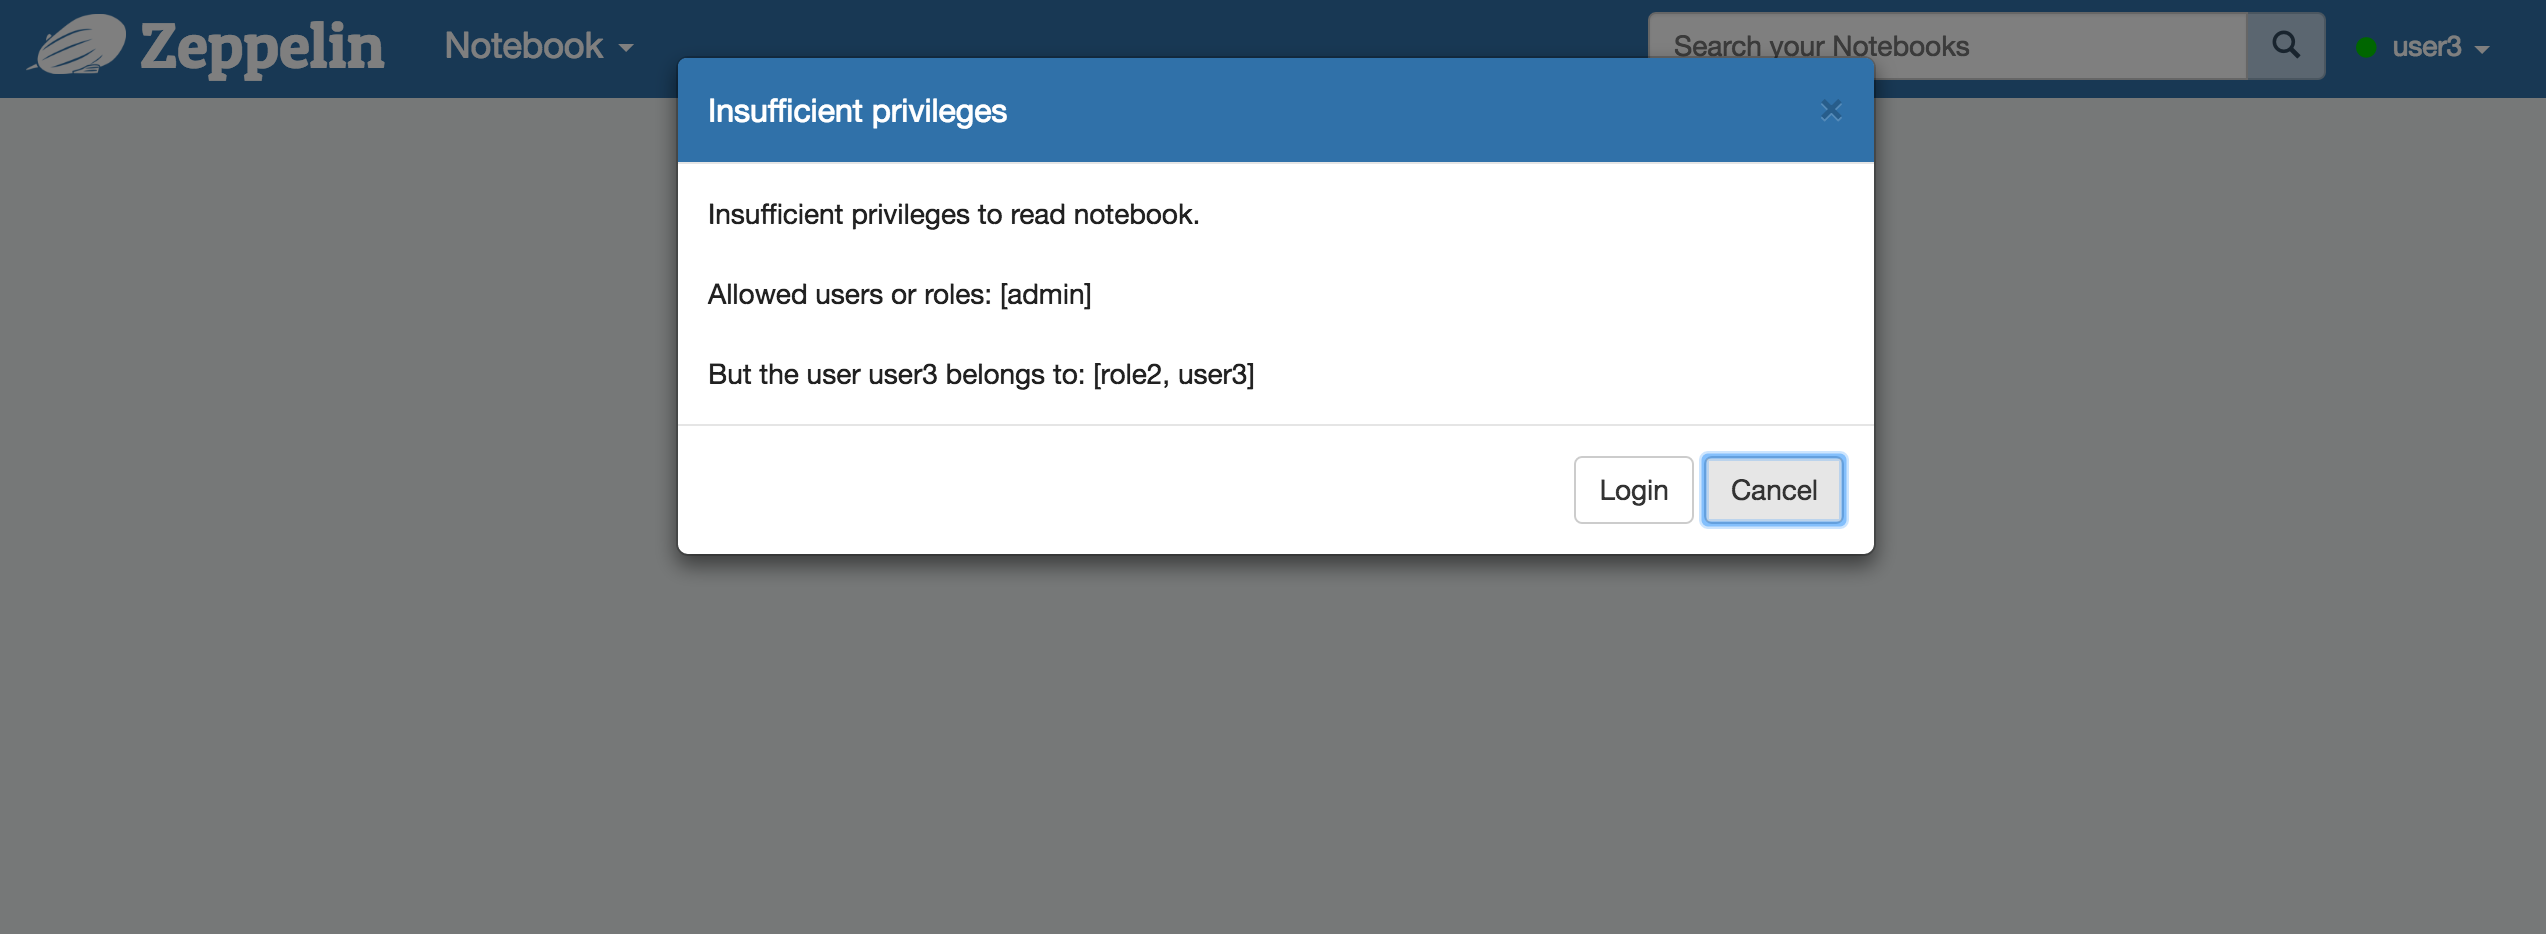
If someone who doesn't have read permission is trying to access the notebook or someone who doesn't have write permission is trying to edit the notebook, Zeppelin will ask to login or block the user.
How it works
In this section, we will explain the detail about how the notebook authorization works in backend side.
NotebookServer
The NotebookServer classifies every notebook operations into three categories: Read, Write, Manage.
Before executing a notebook operation, it checks if the user and the groups associated with the NotebookSocket have permissions.
For example, before executing a Read operation, it checks if the user and the groups have at least one entity that belongs to the Reader entities.
Notebook REST API call
Zeppelin executes a REST API call for the notebook permission information. In the backend side, Zeppelin gets the user information for the connection and allows the operation if the users and groups associated with the current user have at least one entity that belongs to owner entities for the notebook.